Showing posts with label recipes. Show all posts

Friday, March 16, 2012

A New Recipe and a Happy Weekend!

Happy Friday, sweet things! I wanted to share a new recipe with y'all. We happened to have carrots around, and I absolutely love carrot cake. But not wanting to indulge too much, I wanted to come up with a (slightly) healthier option for breakfast and snacking. So I messed around in the kitchen and came up with this muffin. I was thrilled with the results!

Carrot Cake Muffins with Cream Cheese Glaze

~Muffins~
Ingredients:
3/4 cup flour
1 tsp cinnamon
1/2 tsp salt
1 tsp baking powder
1 cup oats

1/2 cup unsalted butter, softened
3/4 cup packed brown sugar
1 egg
1 cup grated carrot
1/4 cup milk
1/2 cup nuts (optional)

Preheat oven to 350*. Combine the flour, cinnamon, salt, powder and oats and set aside. In large bowl, cream butter and brown sugar. Stir in egg. Add milk. Add dry ingredients. Fold in carrots and nuts, if desired. Pour into 12 greased or lined muffin tins. Bake about 20 minutes or until centers are set.

~Cream Cheese Glaze~

Ingredients:
2 oz. softened cream cheese
1 Tbsp softened butter
1/4 cup sifted powdered sugar
milk

Mix butter and cream cheese together until smooth. Add in powdered sugar. Then slowly add milk, one tablespoon at a time to desired consistency. I wanted this to be more of a glaze than a frosting to save on calories, so I used a bit more milk. Once the muffins were cool I drizzled this over them.

Soooo good! I would love to know if you try this and what you think! Hope y'all have a great weekend!

Tuesday, May 24, 2011

Chocolate Cobbler

Well, here it is... the recipe that had my twitter all abuzz yesterday. I didn't take a picture, because mine never turn out very pretty, but it tastes amazing and uses stuff that I typically just have in my kitchen.

Ingredients:
1 1/2 cups flour
1/2 cup shortening
1/2 tsp. salt
milk
1 cup sugar
4 Tbsp. cocoa
1 tsp vanilla
1 Tbsp. melted butter
1 can evaporated milk
3/4 cup milk

The process:
Combine flour, shortening and salt. Mix with hands or pastry cutter until shortening is evenly dispersed. Add milk, 1 Tbsp. at a time until it makes a smooth ball. Roll out on floured board or pastry cloth as thin as possible.

Spread sugar over dough. Sprinkle cocoa over sugar. Add vanilla to melted butter and sprinkle over dough as well. Roll up dough and place into a baking dish in circle. Cut holes in top of dough and pour evaporated milk over roll. Then pour 3/4 cup milk on top.

Bake at 350* until dough is golden and sauce is bubbly. (about 30 min?)

That's the original recipe. The only places I vary are in the rolling of the dough~ I can never seem to get mine to make a smooth roll that doesn't break. The good thing is that it works out in the end whether you have to cut holes in the top or it just falls apart as you place it in the pan. The more places for the milk to sink in the better, in my opinion!

This is perfect served warm with vanilla ice cream. Coffee is also mandatory. Enjoy!

Thursday, April 28, 2011

WooHoo Granola!

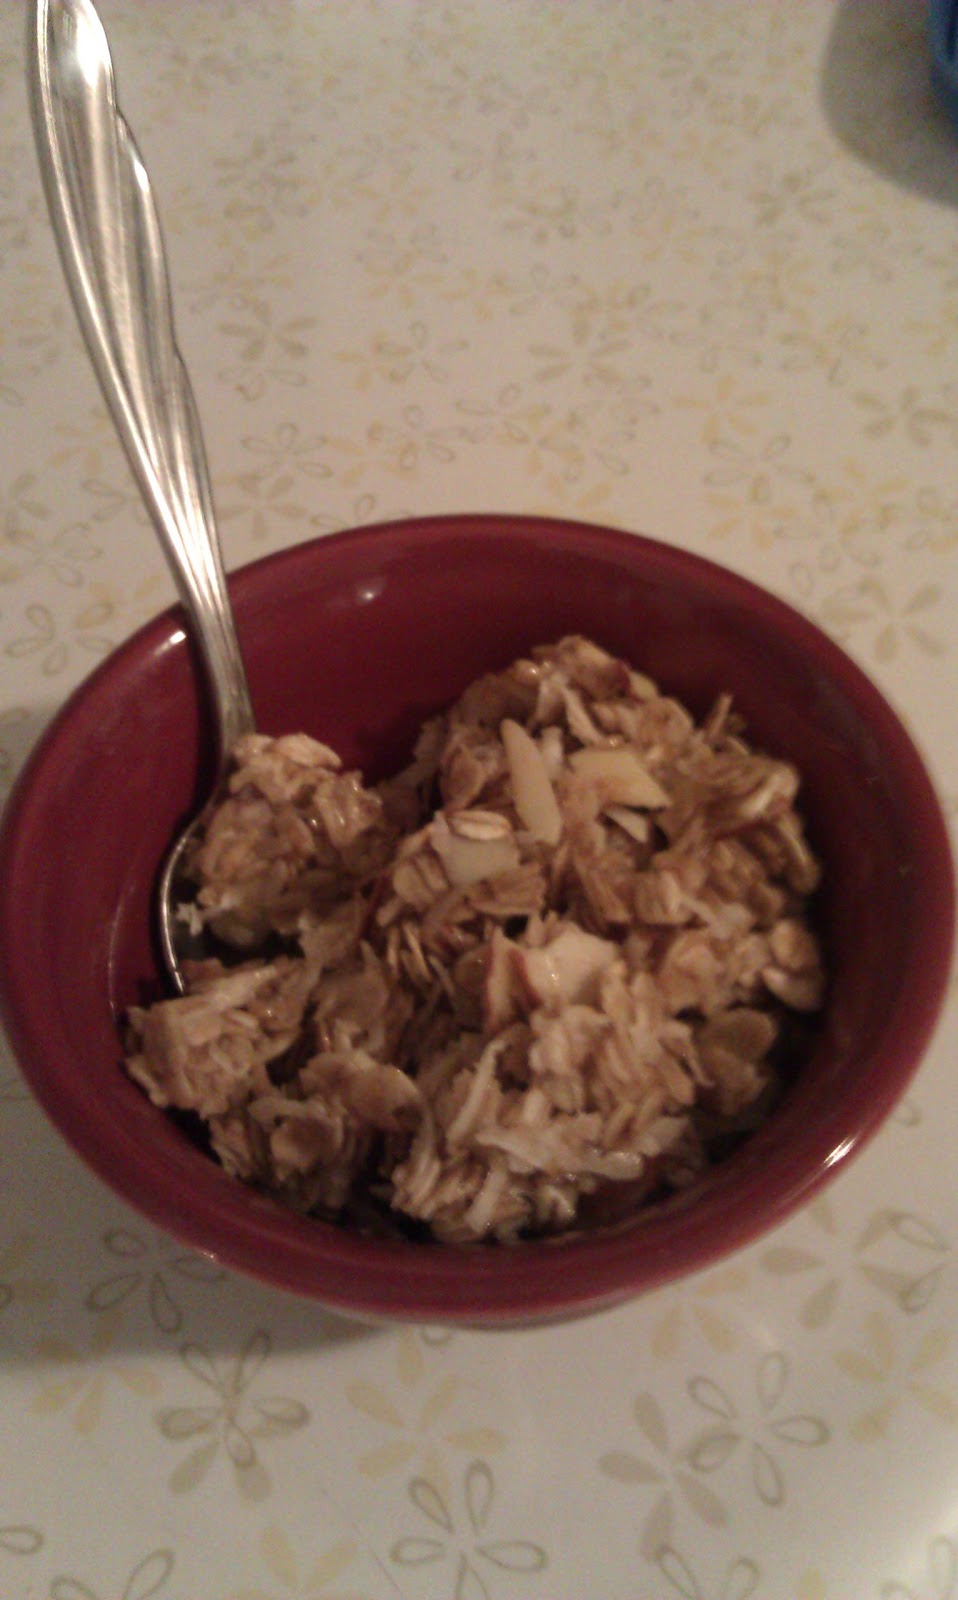
Well, I was really excited about this one... as you can tell by my title.  I was in the mood yesterday for some granola and went digging in my pantry, thinking that I could just wing it and create something. I am thrilled with the result (though not so much the pic from my phone)!

Ingredients (all measurements are approximate, since I really just threw stuff into a bowl...)
~2 1/2 cups oats
~1 cup flaked coconut (not sweetened)
~3/4 cup sliced almonds
1/4 cup (1/2 stick) unsalted butter
1/3 cup brown sugar (I used half dark and half light)
1/3 cup honey
1/8 cup maple syrup
1 Tbsp pure vanilla extract

Method:
Heat oven to 300*. In a bowl, mix together oats, coconut, and almonds. Pour into greased roasting pan and place in oven for about 25 minutes, stirring several times.

While that's in the oven, in a small saucepan on the stove, mix butter, sugar, honey, and syrup over medium heat. Stirring pretty often until butter is melted. Remove from heat and add in vanilla.

Remove oat mixture from oven and pour syrup mixture over it, stirring to coat. Then spread this out on a cookie sheet that's been covered with parchment. Return to oven for about 5-10 minutes. (This last time is a guess because my oven quit working on me... My granola was a bit sticky but still tasted delicious... just leave in there until it sets up a bit.

I'd love to know if you try it! This recipe is pretty exciting to me because I can think of about a zillion ways to change it~ adding chocolate, dried fruit, different nuts, etc. Happy Thursday!

Wednesday, November 3, 2010

Caramel Apples and a Lesson Learned

Happy Wednesday, lovelies! I adore when a simple project looks amazing...  Caramel apples are one of those treats that look really beautiful and are so easy to make.
Remy and Halle were my chief caramel unwrappers. 'Unwrap one, eat one' was the motto of the morning!

Buttering the parchment

The finished product~ Lovely!
We used the easy directions right on the caramel package for dipping the apples, and the littles chose nonpareils and Halloween sprinkles for the toppings. I also chopped up some nuts for good measure. They had a great time from start to finish, and I was thankful that they were still in their pjs because it was super messy!  My one mistake was that I didn't refrigerate them overnight, and in the morning all the caramel had melted to the bottom of the sweet little cello bags I had put them in. I'm still a bit disappointed about that, but our friends were good sports and ate them anyway! (They know I'd be mean if they didn't, and no one wants me to stop making for them!) 

Monday, November 1, 2010

The one where I steal her idea...

... and I should have stolen her picture! (My problem is not that I don't make tons of beautiful desserts, I'm just a lousy photographer!) Last Monday, Carissa posted her 'Death by Chocolate' as part of her miscellany- a gorgeous brownie topped with chocolate icing. Divine! Her post said that they only eat dessert once a week, which is a rule I think we all know I don't abide by. Anyway, we had friends coming for dinner and needed a quick and simple dessert that was also kid-friendly. I whipped up a batch of brownies, per the 'cake-like brownie' instructions, popped them into my mini muffin tins to bake and made up some chocolate icing while they were in the oven. The icing recipe was straight from the Nestle Cocoa can and mixed up easy-breezy. Aren't they cute?!
I do make brownies pretty regularly, but the frosting was the perfect touch to change it up a bit. Do you have a go-to dessert you make when expecting company? What do you do to keep it from becoming mundane?

Friday, October 29, 2010

Cold Weather Favorite~ Taco Soup & {Almost} Homemade Tortilla Chips

I mentioned this soup the other day and couldn't stop thinking about it... I love that it's inexpensive, and mixes up in just a few minutes. I add my (Almost) homemade tortilla chips, and it's the perfect meal in cold weather.

~First the Chips: These are one of my favorite kitchen 'fakes' because they taste way better than chips from a bag, and people always think you went to some crazy measures to make chips. (And I say, let them believe it!) All you do is buy a pack of extra thin Corn Tortillas. (I have done it with any kind of tortilla, but the extra thin works best in my opinion...) I use my pizza cutter to cut through several rounds into the desired shape (My kids prefer triangles so we stick with that, but I love strips in soup!). Spray a baking sheet with oil, and lay the pieces in a single layer on the sheet. Put into a 350* heated oven, and bake until the edges start to turn up, about 12 minutes. Flip the chips over and put back into the oven until golden brown, about 5-10 minutes. Remove from oven and salt, if desired.

The only catch is that timing is key. You do not want the chips under baked because they will be chewy (trust me). I always have to force myself to leave them for a few more minutes than I think they actually need.

~Now for the Soup~
Ingredients:
     2 cans kidney beans
     2 cans pinto beans
     1 can corn, drained
     1 can ro*tel
     1 can diced tomatoes
     1 packet taco seasoning
     1 packet ranch seasoning
     1 pound ground beef
     1 medium onion, diced

Simple directions: In a large stockpot, brown beef. Drain. Return beef and add onion, cook until soft. Add everything else to the pot plus 2 cans water. Cook on high until boiling then lower heat and simmer for about 30 minutes. Serve. So easy, right?!

Where Moms Who Blog Go!
This week's Writer's Workshop prompt was to create a how-to, and I already had this one ready... Yippee!

Wednesday, October 13, 2010

A Bit of House-Wifery~ Chocolate Chip Cookies

I've decided to stick with blogging about my favorite house wife things... Last week I blogged about my dream 'uniform', and today I thought I would share a Top Secret recipe. I've said it many times, but I truly feel like a qualifying skill necessary for being a good mother and housewife is making perfect chocolate chip cookies. (If you aren't a baker, please don't send me angry emails... this is actually not mandatory~ just something I had in my crazy brain!) I searched just to make sure I hadn't posted this before and couldn't find it.
Sorry for the picture with bright flash... I have serious lighting issues!

My recipe really isn't anything fancy, but it consistently makes the best chocolate chip cookies I've ever had. I use the best ingredients I can and have made it in variations with organic, non-organic, name brand, off-brand, and this recipe has never failed me. I think it's from Better Homes & Gardens, though I have it memorized and am too lazy at the moment to look for it in a book.

Ingredients
1/2 cup shortening
1/2 cup unsalted butter, softened
1 cup packed light brown sugar
1/2 cup granulated sugar
1/2 teaspoon baking soda
2 eggs
1 teaspoon pure vanilla
2 1/2 cups all purpose flour (I use unbleached)
12 oz. semisweet chocolate chips
1 1/2 cups nuts (optional)

~Heat oven to 375*
~ In large bowl, mix shortening & butter. Blend until smooth. Add in sugars and baking soda. Beat in eggs and vanilla. Mix in flour a little at a time until well blended. Stir in chocolate (and nuts, if using).
~On baking sheet lined with parchment, scoop out dough with plenty of space between. Most of the time I use a 1/4 cup cookie dough scoop and make fewer, giant cookies. I can fit about 16 on a cookie sheet this size. You can use whatever size scoop you like, just adjust the baking time accordingly. I think it works better to leave them in a ball shape, as they will cook up softer in the middle and won't be cracker-like.  (If that's your thing, press them out a bit!)
~Bake for 12-15 minutes, pulling them out when they begin to brown around the edges but still look soft in the middle. leave on sheet for about 5 minutes and then transfer to a wire rack to eat cool.

Ours usually don't last long enough to have to store them, but I recommend keeping them in an airtight container after they've completely cooled. And if you really want to be June Cleaver (because who doesn't!?), put a piece of bread in the container with the cookies to keep them soft. Trust me, if you haven't heard of this, it works! The cookies steal the moisture from the bread and stay extra soft.

I'd love to know if you try out this recipe!! And I'd also love to know if there's anything in the vein of homemaking that you'd like to talk about~ recipes, organization, cleaning, laundry... I'm thinking this will be a regular Wednesday thing, and I'd love your input! 'Til next time!


Tuesday, August 31, 2010

Spa Night Recipes

I decided on Friday to put some of my years of experience selling at Crabtree & Evelyn to use and try to make some natural beauty treatments of my own for our girls Spa Night. Using only what I had on hand in the kitchen I mixed up an exfoliating foot scrub, a face mask, and a citrus hand scrub. I apologize that I didn't use any exact measurements, but I just kind of mixed things up until they looked like I thought they should. (I'm NO scientist!)


Brown Sugar Foot Scrub
1/2 cup finely ground oats
1/2 cup coarsely ground oats (for the oats, I put 1 cup in my baby food grinder and took out half when it was coarsely ground. Then I continued grinding the second half...)
1 cup brown sugar
about 2 Tablespoons honey
about 2 Tablespoons aloe vera gel
squeeze of fresh lemon juice
Extra Virgin Olive Oil~ with this I just added until the consistency was smooth

This was awesome,  and it smelled a lot like an oatmeal cookie!. The only thing I think I will change when making it again would be to add some vanilla or cinnamon.

Refreshing Face Mask
This was really simple. I took some organic Greek yogurt (choose a yogurt with live, active cultures) and added finely ground oats and a bit of honey. We applied it on the face and left it for about 10 minutes. Then we rinsed it with warm water and followed up by applying a warm wash cloth to the skin for a few minutes. Skin felt great afterwards!

Citrus Hand Scrub
1 cup granulated sugar
Juice of 1 lemon
Olive Oil to desired consistency

All of these recipes turned out better than even I had hoped! The girls loved them, too, and the pampering was good for everyone... I guarantee that I will be making these again, maybe even for the holidays, packaging them in cute jars or something. I'd love to know if you try them and what you think!

Wednesday, January 27, 2010

Easy Potato Soup


I have to tell you, I have a bit of a milk problem. Or rather, I have an issue with those pesky 'Sell by' dates they print on things. As the date inches closer I have this terrible fear of milk going bad. I'm constantly asking Trace to smell/taste things just to satisfy my irrational fears. Fortunately for me, as I've said before, he's a pretty good sport.

Growing up I can remember in colder weather as the date on the milk would get nearer my mom would decide that the milk must quickly be used, and one of the most common ways she would do that is by making potato soup. Soup is absolutely one of my favorite things about colder weather, and I thought I would share this simple but super-tasty recipe with you that I made today. It consists of just a few ingredients that we typically have on hand and can be ready in minutes!

This recipe makes enough for 2 adults & 2 toddlers but can easily be multiplied...

Wash and peel 5 large potatoes. Chop the potatoes into equal sized pieces (I prefer larger chunks, but you can make these as small or large as you like). Bring a pot of salted water to a boil and drop in the potatoes. Boil until potatoes are soft when pierced by a fork. Drain potatoes and set aside until sauce is ready.

To make the cream sauce: Melt 2 tablespoons butter in pan on medium-high heat. (I like to use the same one I just had the potatoes is to save on dishwashing time...) When the butter is melted, add 2 tablespoons flour and stir until it starts to get golden and bubbly. (This is called a 'roux', for all you technical cooks out there.) To this add 2 cups milk slowly and any seasoning you want. Stir constantly until it comes to a boil. Turn the heat down to medium -low and add in the softened potatoes. For seasoning I add whatever I have on hand. Today I added a bit of minced onion & garlic seasoning. And you're done~ Easy!

I like to serve mine smothered in shredded cheese, as you can see in the picture, but it's just as delicious on its own!